Now that the PVS core infrastructure has been setup and configured, it is now time to turn our attention onto creating and capturing an image that we can then be streamed via Provisioning Services
Citrix PVS 7.6 Install – Part 4: Creating a Capture VM
This is part 4 in the Citrix Provisioning Services 7.6 installation and configuration guide. In this article we be creating and configuring the machine that will be used to capture the image we will be using to stream to the target devices.
Quick Links
Here are the links to each of the articles that make up this series:
- Citrix PVS 7.6 Install & Configuration Guide – Introduction
- Citrix PVS 7.6 Install & Configuration Guide – Part 1: Installing PVS Server
- Citrix PVS 7.6 Install & Configuration Guide – Part 2: Configuring PVS Server
- Citrix PVS 7.6 Install & Configuration Guide – Part 3: Configuring DHCP for Citrix PVS PXE
- Citrix PVS 7.6 Install & Configuration Guide – Part 4: Creating a Capture VM
- Citrix PVS 7.6 Install & Configuration Guide – Part 5: Group Policy for PVS Target Devices
- Citrix PVS 7.6 Install & Configuration Guide – Part 6: Preparing for Image Capture
- Citrix PVS 7.6 Install & Configuration Guide – Part 7: Capturing the PVS Image
- Citrix PVS 7.6 Install & Configuration Guide – Part 8: Installing Virtual Delivery Agent on the PVS Image
- Citrix PVS 7.6 Install & Configuration Guide – Part 9: Preparing for Production use
- Citrix PVS 7.6 Install & Configuration Guide – Part 10: Creating new PVS Target Devices
- Citrix PVS 7.6 Install & Configuration Guide – Part 11: Creating a PVS-Enabled Machine Catalog
- Citrix PVS 7.6 Install & Configuration Guide – Part 12: Creating a Delivery Group
- Citrix PVS 7.6 Install & Configuration Guide – Part 13: Testing Published Applications
Step-by-Step Guide
1. To be able to capture a PVS image, we need to create a VM that will be come the image to be captured
Note: In this series we are using Citrix PVS to deploy Citrix Application Servers that will then be used to publish applications to users. You can also use PVS to deploy workstation machines to be used in XenDesktop as your VDI environment. The VM you build now will depend on what you are going to be using your PVS image for
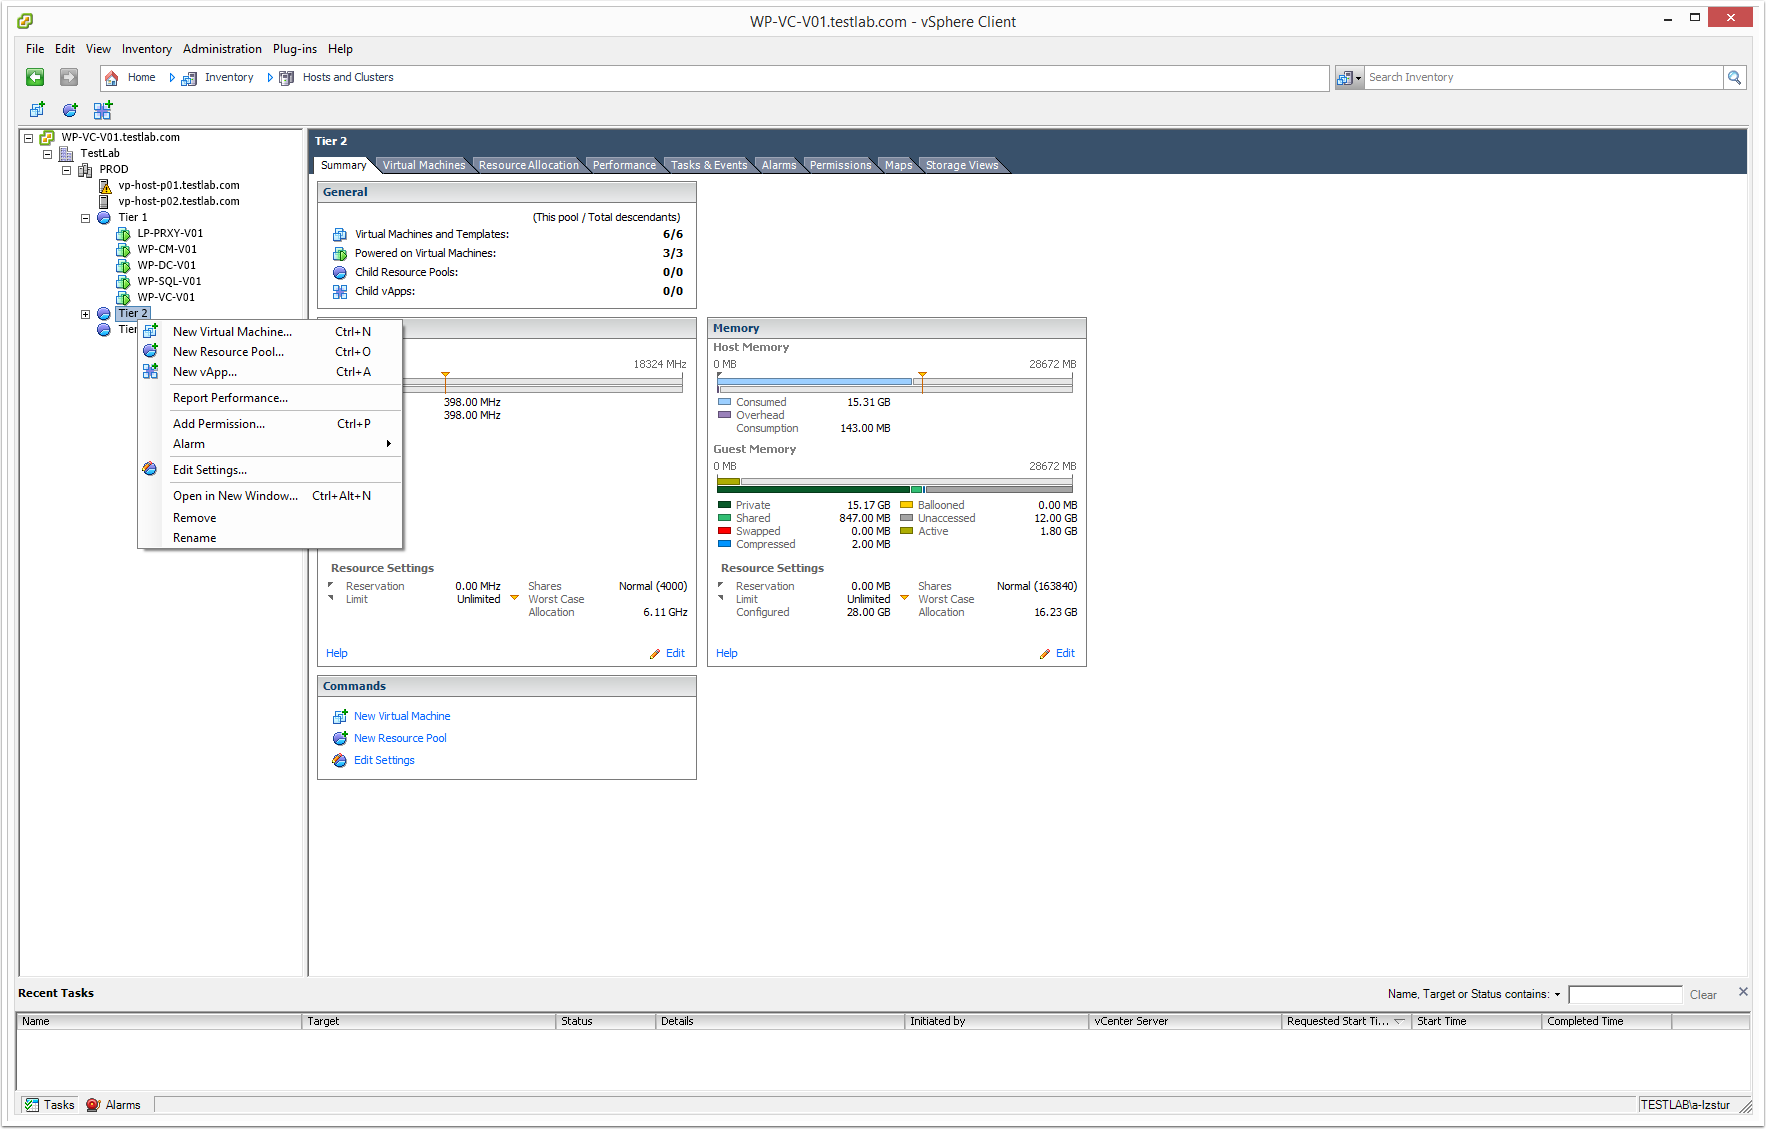
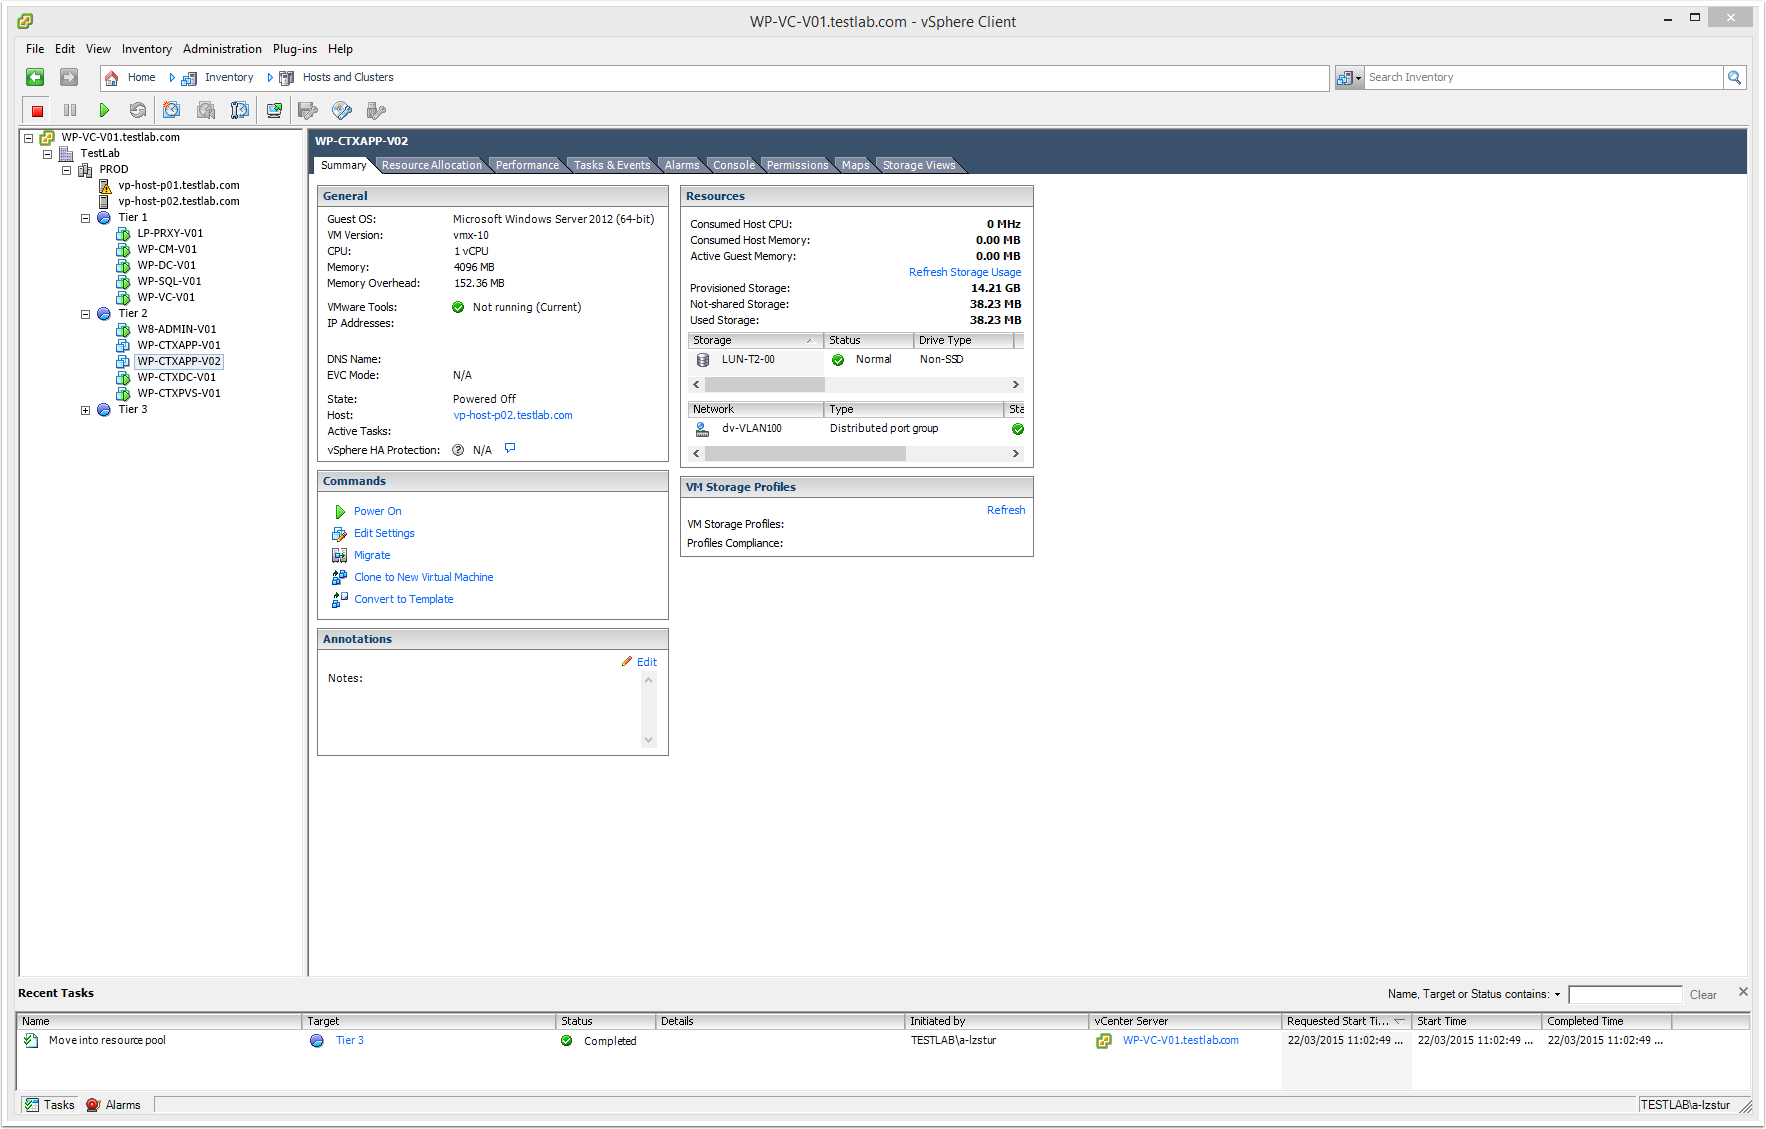
2. From vSphere Client, create a new VM
3. In this example, I am using WP-CTXAPP-V02 running Windows Server 2012 R2 as the PVS Capture VM
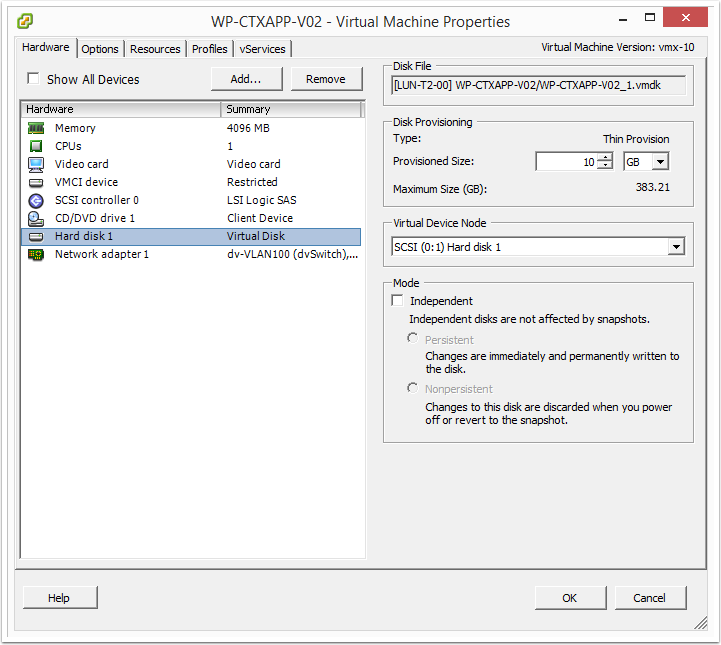
4. Attach a second hard drive to the PVS Capture VM
We attach a second hard drive to the VM as it will be used for:
- Page file (for performance reasons, we do not want the page file to be on the captured image)
- Redirect Event Logs (this is to ensure they are saved even when the device is rebooted)
- Any additional files that need to be persistent across reboots (e.g. application specific files such as license files, user profiles, etc)
In this example, I am only using a 10GB second hard drive, however you can have it as big or as small as you want. Eventually this will become the only hard drive attached to each PVS target device VM (as the system drive – C:\) will be streamed from Provisioning Services
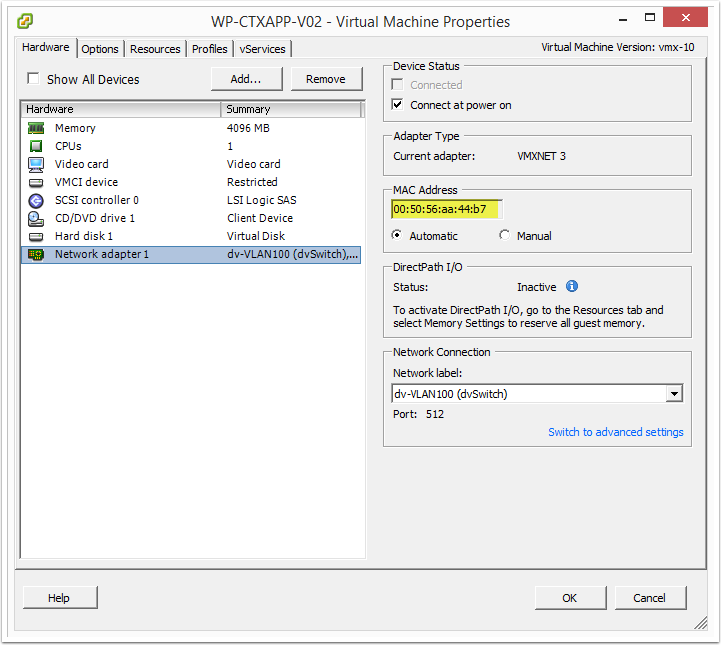
5. Record the MAC address of the VM. This will be used later when create the PVS Capture VM as a PVS Target Device within the Provisioning Services Console
6. Power on the VM and install and configure the guest OS as required
7. Install hypervisor tools on the VM (i.e. VMware Tools, etc). Restart VM
8. Configure the second hard disk as drive D in Disk Management
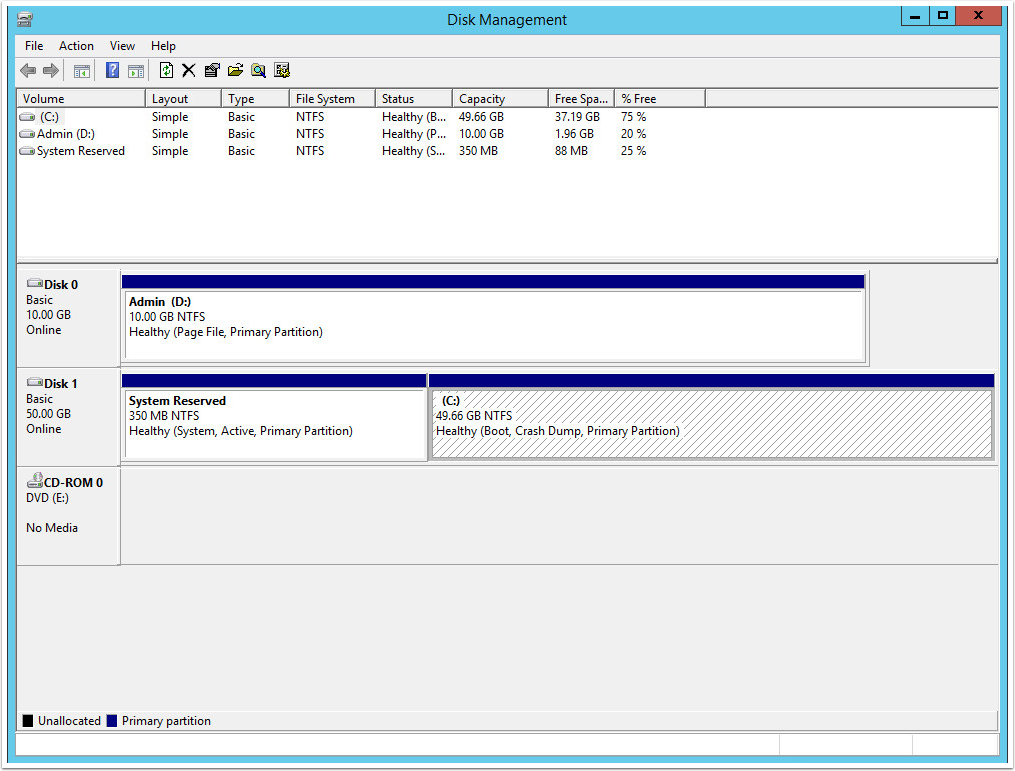
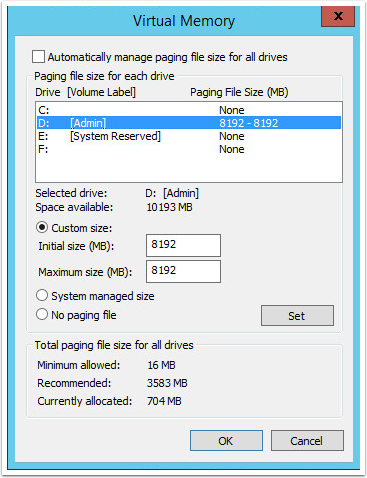
9. Configure the Windows page file to be on the D drive only. Restart VM
To do this, complete the following:
- System >> Advanced System Settings
- Advanced tab >> Performance >> Settings
- Advanced tab >> Virtual Memory >> Change
- Untick "Automatically manage paging file size for all drives"
- Select C: and select the "No paging file" option
- Click Set to apply the changes (Click Yes to the warning)
- Select D: and select the "Custom Size" option
- Enter the values for the size of the Windows Page File (in our example this is 8GB)
- Click Set to apply the changes
- Click OK to close the Virtual Memory window
Your Windows page file settings should look similar to the screenshot below…
10. Join the VM to the domain. Restart VM
11. Install all of the applications that are required on the VM. Restart VM
Note: These are the applications that will be published if you are using your PVS target devices as Citrix Application servers. Alternativley, if you are using your PVS target devices as XenDesktop machines then these are all the applications you want to provide as "local installs" for your clients – e.g. Microsoft Office, Adobe Reader, etc.
In our example, I am using my PVS target devices as Citrix Application Servers that will be publishing Active Directory Tools, so therefore I have installed Remote Server Administration Toolkit on the VM.
12. Install all OS and \ or application updates. Restart VM
13. Make any other Windows configuration changes as required
Next article…
The next article coming up in the series is: Citrix PVS 7.6 Install & Configuration Guide – Part 5: Group Policy for PVS Target Devices.
In part 4 of this series, how do you perform these same task in Zen Server 6.5
Hi Luis,
I am not sure 100% what you are referring to, however if you mean Provisioning Services 6.1, then have a look here >>> http://support.citrix.com/proddocs/topic/provisioning-61/pvs-target-image-prepare.html
Hope this helps
Luca
Hi Luis,
To perform these similar steps in XenServer 6.5 is same as Luca is mentioning in this part for VMware vSphere, create a new VM in your XenServer and follow from his Step No:4 till the end.. I hope this works and helps you out..
Shoaib Abdulla
Thanks Shoaib!
Unless I missed it, you don’t ever state when exactly to install VDA on the image. Please advise for us noobs. Thanks.
Please ignore. I see we install the VDA in Part 8.
A good guide but I have some questions.
You mention adding a second hard drive but the screen shots only show Hard disk 1 and this being the 10GB persistent data drive. The OS drive does not seem to be listed.
Why do you move the pagefile in the guide as the PVS drivers do this automatically on each target device and move this to the write cache drive.
Thanks
Hi Martyn,
Yeah you are right, this is just a screenshot error. I had some issues with the screenshots when I was doing the guide so I had to go back and re-take a whole bunch of them and I must have just missed this one with the second drive. Sorry about that.
The reason why I did this is actually because my current workplace has a server build standard to have a second drive with the paging file on it, and hence that is why I did this. There is no actually mandatory reason and as you mention this is taken care of automatically in a normal situation.
In hindsight, for this guide I should have left it out 🙂
Thanks for the questions and helping others to clarify some of these configuration items.
Luca