We have now completed the PVS image and it is ready to be used in a production type environment. When I say that I essentially mean in Shared Mode or read-only mode which means that it can be streamed to multple PVS target devices at the simultaneously. In addition, we no longer need the capture VM, so we will be converting it into a standard PVS target device. We can use this VM as a template to deploy other target devices from. To complete these tasks, follow these steps:
Citrix PVS 7.6 Install – Part 9: Preparing for Production use
This is part 9 in the Citrix Provisioning Services 7.6 installation and configuration guide. In this article we be making the final changes to the image in order to convert it into Share Mode to be used in production. We will also be repurposing the capture VM into a standard target device.
Quick Links
Here are the links to each of the articles that make up this series:
- Citrix PVS 7.6 Install & Configuration Guide – Introduction
- Citrix PVS 7.6 Install & Configuration Guide – Part 1: Installing PVS Server
- Citrix PVS 7.6 Install & Configuration Guide – Part 2: Configuring PVS Server
- Citrix PVS 7.6 Install & Configuration Guide – Part 3: Configuring DHCP for Citrix PVS PXE
- Citrix PVS 7.6 Install & Configuration Guide – Part 4: Creating a Capture VM
- Citrix PVS 7.6 Install & Configuration Guide – Part 5: Group Policy for PVS Target Devices
- Citrix PVS 7.6 Install & Configuration Guide – Part 6: Preparing for Image Capture
- Citrix PVS 7.6 Install & Configuration Guide – Part 7: Capturing the PVS Image
- Citrix PVS 7.6 Install & Configuration Guide – Part 8: Installing Virtual Delivery Agent on the PVS Image
- Citrix PVS 7.6 Install & Configuration Guide – Part 9: Preparing for Production use
- Citrix PVS 7.6 Install & Configuration Guide – Part 10: Creating new PVS Target Devices
- Citrix PVS 7.6 Install & Configuration Guide – Part 11: Creating a PVS-Enabled Machine Catalog
- Citrix PVS 7.6 Install & Configuration Guide – Part 12: Creating a Delivery Group
- Citrix PVS 7.6 Install & Configuration Guide – Part 13: Testing Published Applications
Step-by-Step Guide
1. At this point the Capture VM (i.e. WP-CTXAPP-V02) should be in a powered off state.
2. From the vSphere Client, Edit Settings of the VM
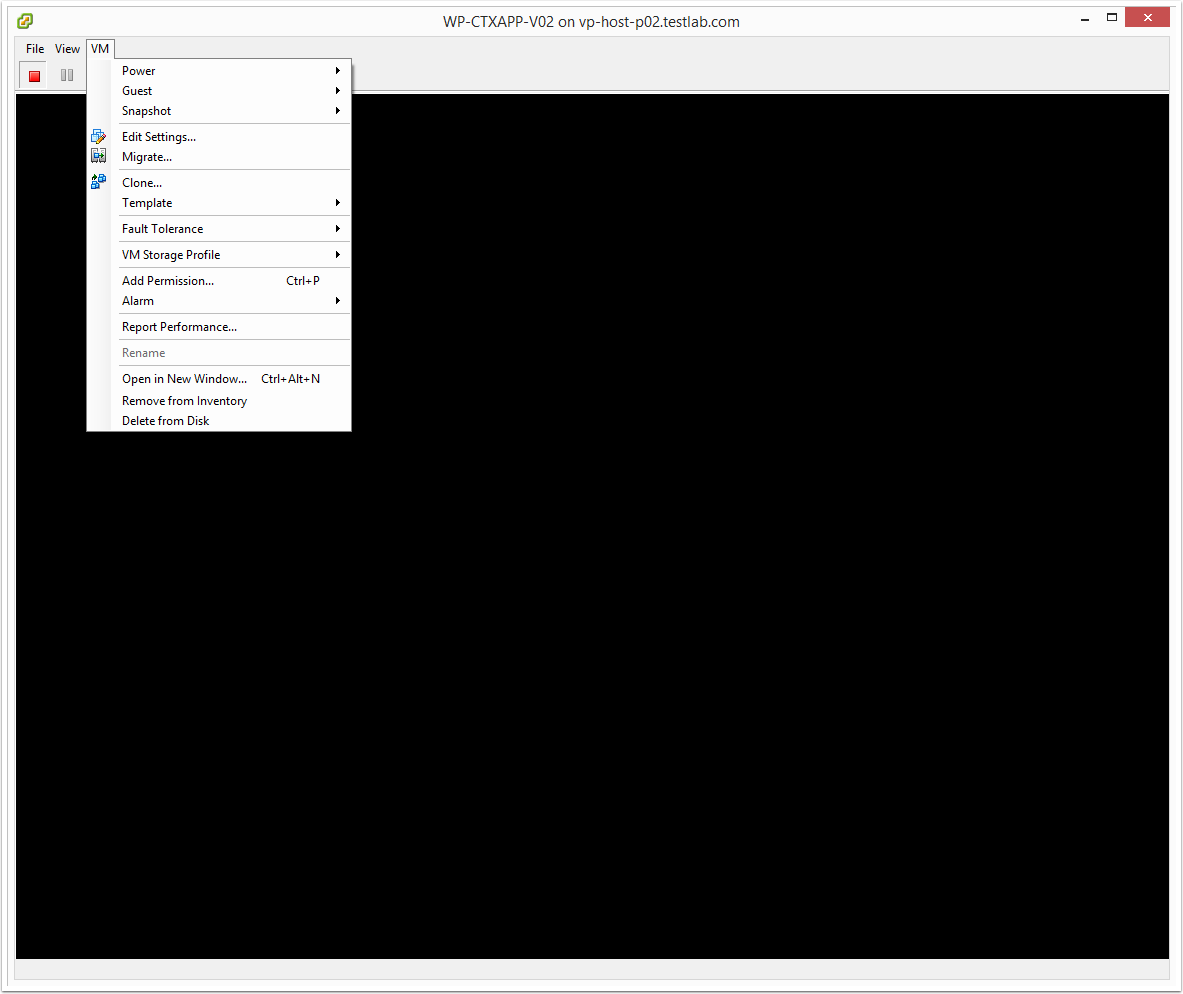
3. Select the System hard disk (C:\) and deleted it
This disk is no longer required, as the system disk is streamed from the PVS server. The only disk we need is the secondary disk (D:\) as it will contain all of the files that we want to remain persistent for that server.

4. The VM settings should now look like this (only one hard drive of 10GB left)
We can now use this VM as a clone or a template and provision as many PVS devices as required. At this point, you can convert this VM into a vSphere Template so that you can easily create new PVS Target Device VMs. Alternatively you can use this VM as one of your PVS Target Devices and when you need more just power it off and clone it to create new PVS target devices. In this guide, I am going with option 2 as in a test lab environment I am not going to be deploying more than two PVS target devices.

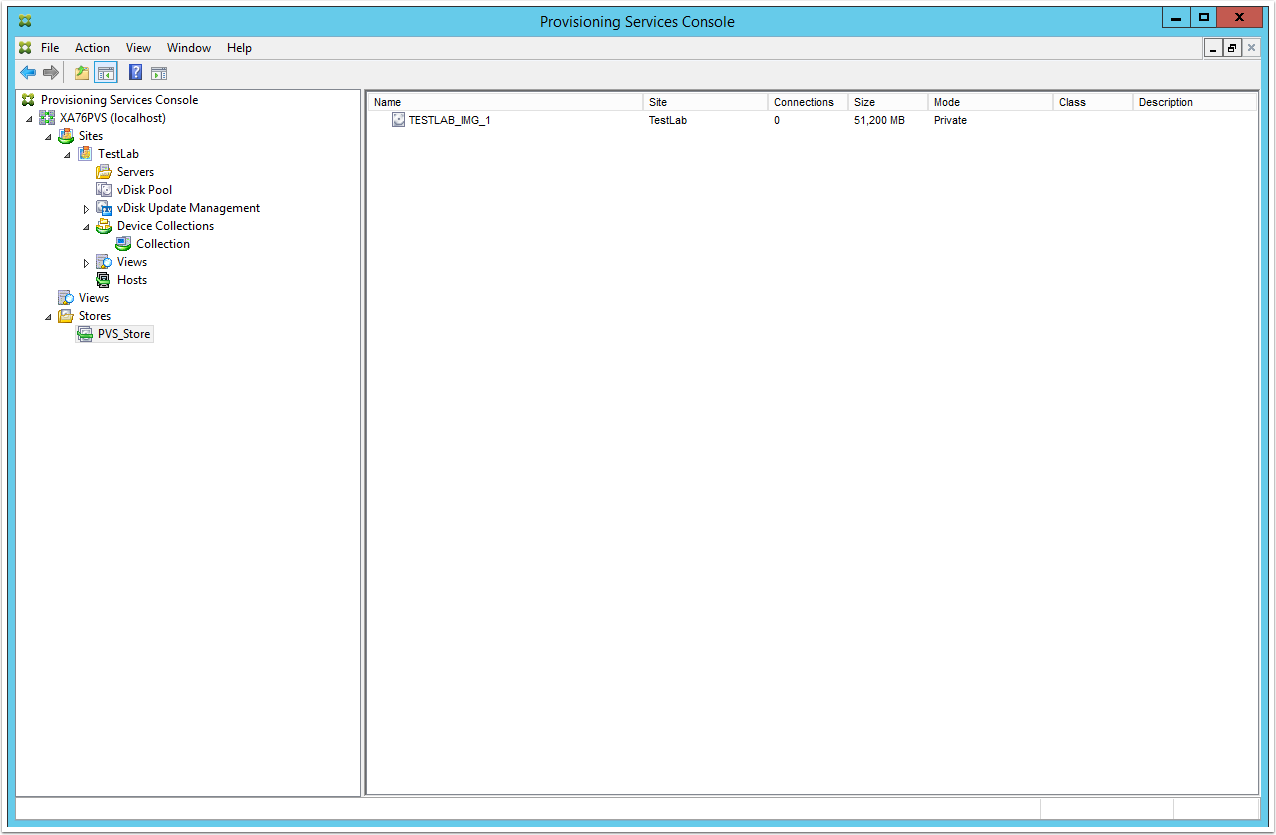
5. Log into the Citrix PVS 7.6 server and launch the Provisioning Services Console
6. From the PVS console, navigate to the PVS store that contains the image
In this example the PVS store is called PVS_Store
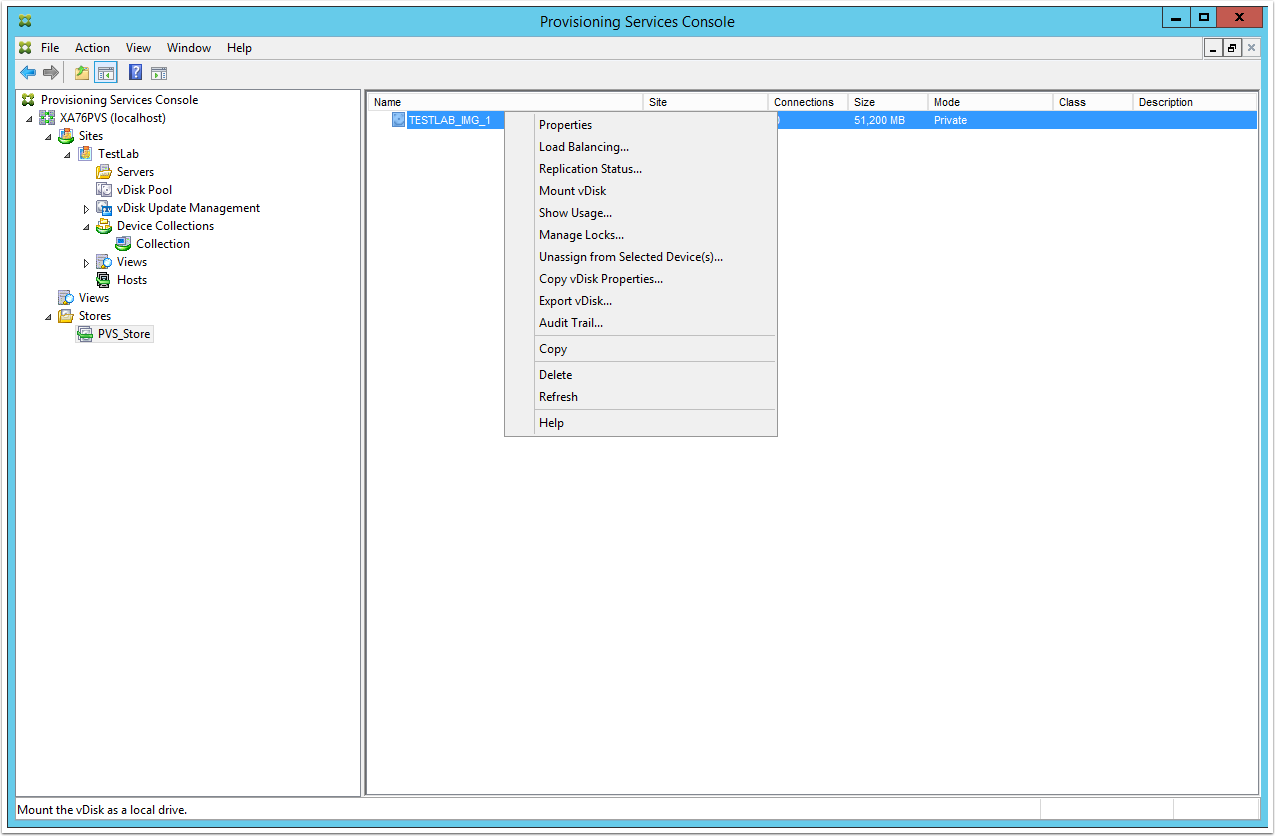
7. Right-click on the captures image and select Properties
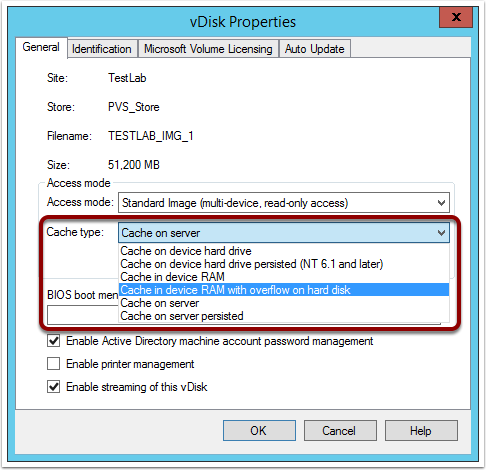
8. From the vDisk Properties window, change the access mode from Private Image to Standard Image
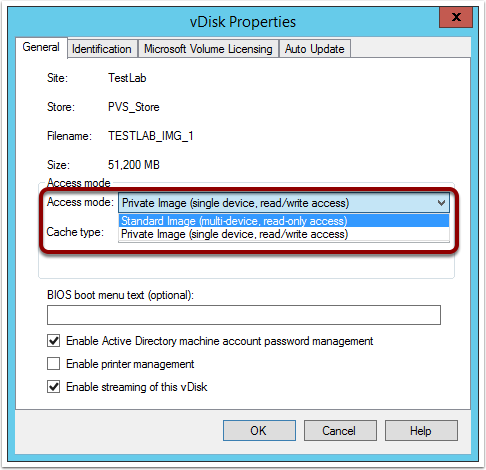
9. From the same window, change the Cache Type to "Cache in device RAM with overflow on hard disk"
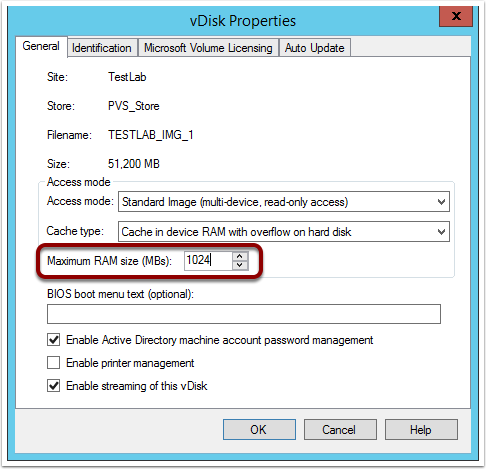
10. Set the maximum amount of RAM on the device that will be used as a write-cache
Note: Depending on what your PVS image is being used for, you may want to set this more than 1GB. I only used 1GB as this is a test lab environment and has no actual work load. In reality you may want to configure this to be something more like 4- 8GB. In the event that you do, you will also then need to ensure that each PVS target device VM has enough RAM allocated to it.
The amount of RAM allocated should be the amount used for cache PLUS the amount you want to the PVS target device streamed operating system to use. For example, if you are using 4GB for the write-cache and you want the OS to also be able to use 4GB then the amount of memory configured on the PVS target device VM should be 8GB.
11. Ensure the "Enable Active Directory machine account password management option" is enabled
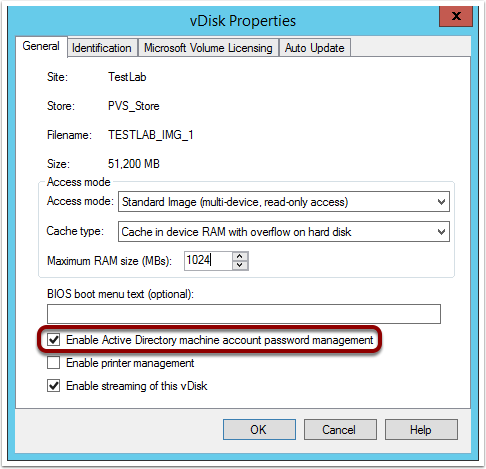
12. Click OK to save all changes to the vDisk Properties
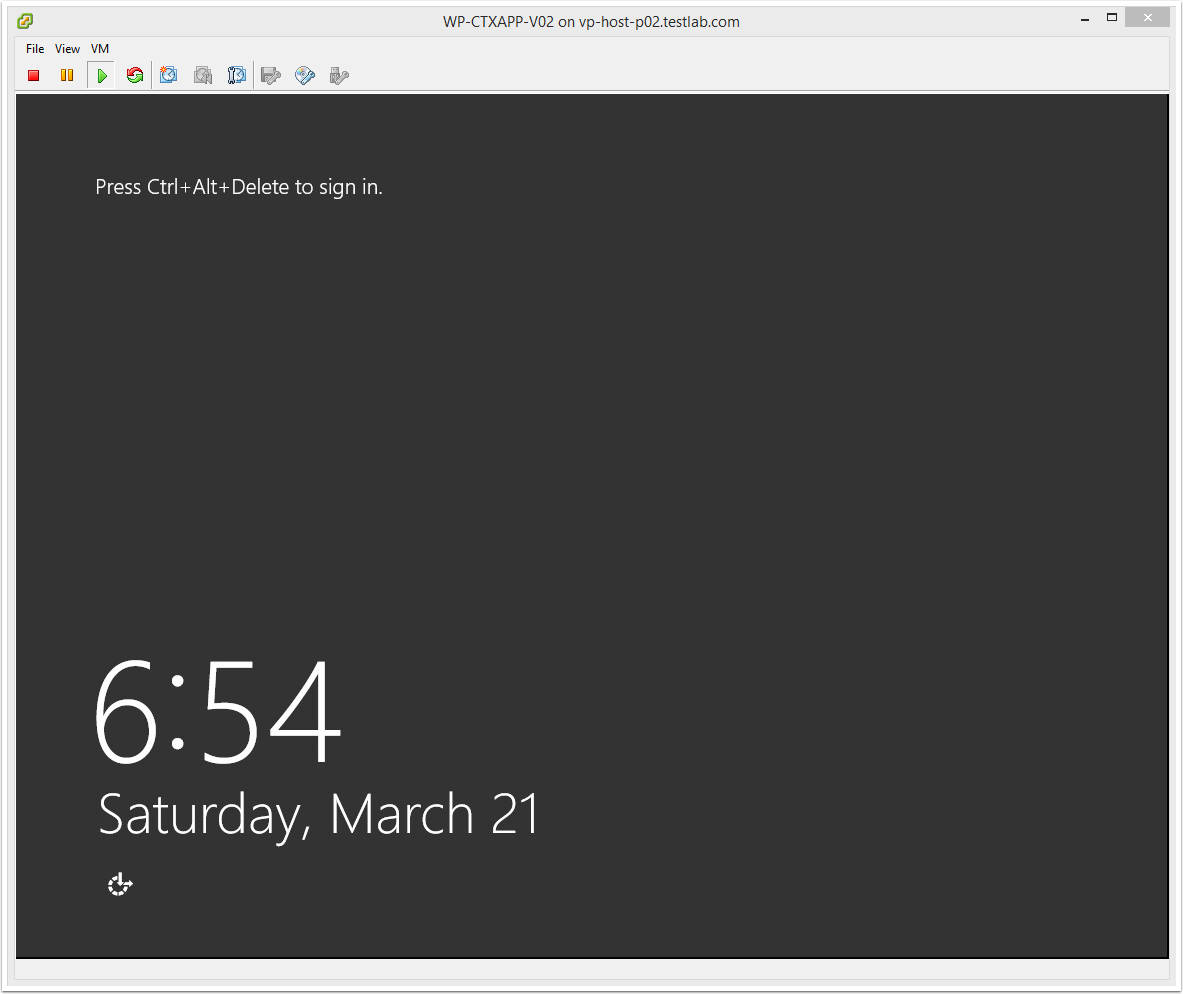
13. Power on the PVS target device (i.e. WP-CTXAPP-V02). It should now automatically PXE boot and load the PVS image in Shared Mode (i.e. read-only mode)
Next article…
The next article coming up in the series is: Citrix PVS 7.6 Install & Configuration Guide – Part 10: Creating new PVS Target Devices.
Either at Step 6 or Step 13 you need to change the Target Device to boot from vDisk instead of the original Hard Disk, otherwise it won’t PXE boot.
Hi Jim,
That is already completed at step 3 in Part 6 of the series (Citrix PVS 7.6 Install – Part 6: Preparing for Image Capture).
Thanks
Luca
Hi Lucas,
Followed every step. But only difference is I cloned the original VM and then deleted the C drive. I created a new device under the device collections and added the MAC address of the cloned VM. Then put it in maintenance mode and started it with the image being in private mode. But, I get
PXE-MOF: Exiting Intel PXE ROM
Operating system not found
What could be wrong? I am just this close to get this concept understood and I am not able to.
Dear Luca, as per your this Article i followed proper steps from 1 – 12, when I came to step 13 my VM failed to reboot saying “No Bootable drives been found or no OS…” As I am Deploying this Lab on Xenserver 6.5 not on VMware vSphere. Please do assist.
Hi Shoaib,
At step 13, your VM should be PXE booting from the Citrix PVS server and then getting the image you captured streamed to the VM. The steamed image is what is used to boot the VM.
Is your VM PXE booting?
Hi Shoaib,
I got same error, and I re-check “Target Device Properties” Site > Device Collection > …
In General tab, I set boot from “hard disk” it’s so ok.
Hope this help.
Additional info to more clearly:
In General tab, change disk attribute from “hard disk” to “vDisk”.
I have tried a few step-by-steps for PVS and yours is the easiest to follow. One step which another site had was going into the system tray, right-clicking on the Virtual Disk and clicking Virtual Disk Status. This will verify the vDisk mode which in this case after step 13 should read “Mode: vDisk: Read Only, Cache Type: device RAM with Overflow on local hard drive”
Hi Luca,
Thanks for writing such a wonderful article on PVS installation & configuration.
I have a question about setting up the Maximum RAM size on vdisk property Window.
In our environment we have assigned 8GB of RAM on each persistent vdi machine. For cached drive we have have assigned 8 GB of disk space, however if we go to PVS server and check the RAM size on vDisk property Window it is set to only 256 MB and I believe due to this users face issues while installing heavy softwares and the cached drive of there VDI gets full and the machine got stuck.
Kindly provide some more understanding on how to determine the “Maximum RAM size(MBs)” on vdisk property Window.
Thanks in advance.
Any chance of article on creating image for PvD desktops?
On step 8. The PVS properties are greyed out it says vdisk properties (read only) and the box reports properties are read only. Why would that be? I tried restarting services then I rebooted the PVS server it didn’t help.
Hi Luca,
First thanks for your great instructions. I followed almost everything but I did not delete the hard disk (C drive) from the original VM, instead I cloned another VM. As, I wanted to shut that machine down and then use the cloned VM. I removed the hard disk 1 (C system drive) from the cloned VM and converted this to the template. But, now as per your instructions same like others, when I tried to power on the PVS Target device (which is the cloned VM) I even changed the MAC address on the Device Collection to reflect the MAC address on the cloned VM. I boot the VM as per on step 13 and I get the following error message
PXE-351: No DHCP or ProxyDHCP offers were received
PXE-MOF: Exiting Intel PXE ROM
Operating System not found
I changed the Disk to be vDisk from Hard disk but still same issue. Any suggestions where I am doing wrong?