1. Log into a Citrix Delivery Controller and launch Citrix Studio
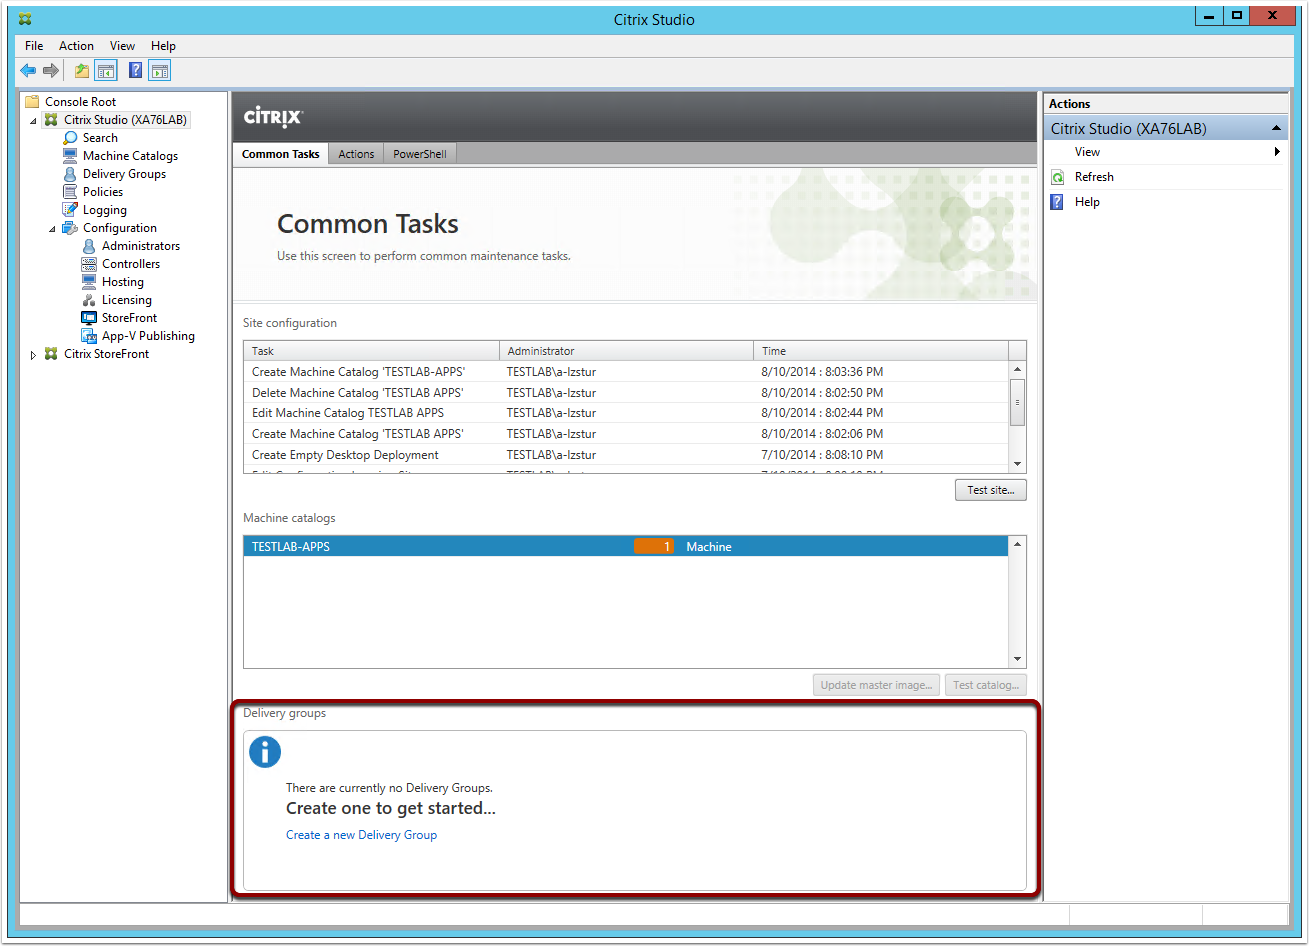
2. From the Citrix Studio root window, click on "Create a new Delivery Group" link
Note: Alternatively you can create a new Delivery Group from the corresponding section in the Main Menu
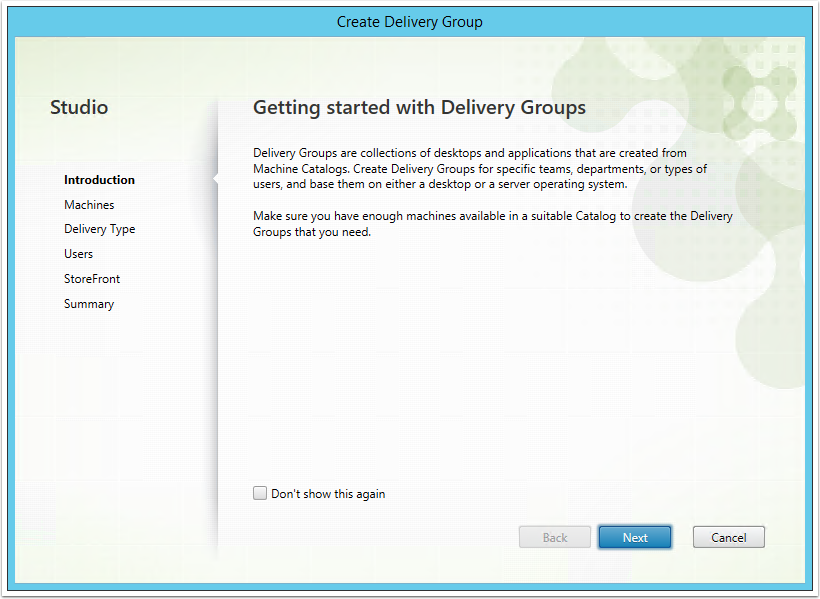
3. The Create Delivery Group Wizard will display. Click Next
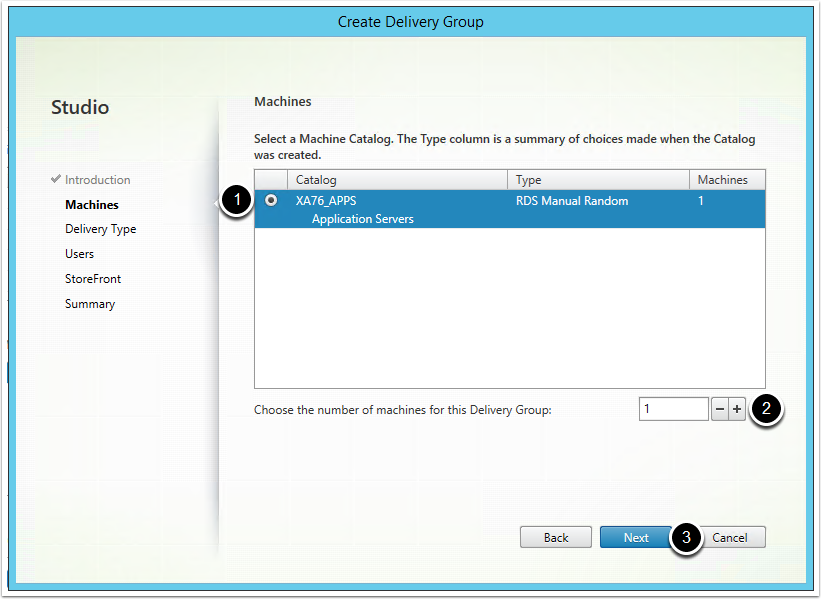
4. From the Machines screen, complete the following steps:
- Select the Machine Catalog you want to add into the Delivery Group (in this example we only have one)
- Chose the number of machines from the Machine Catalog that will be used in the Delivery Group
- Click Next
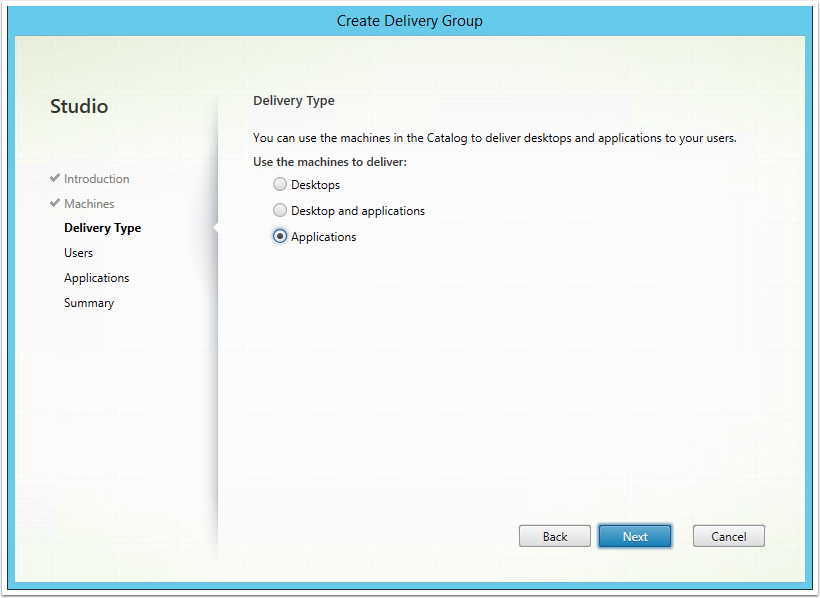
5. Select Applications and click Next
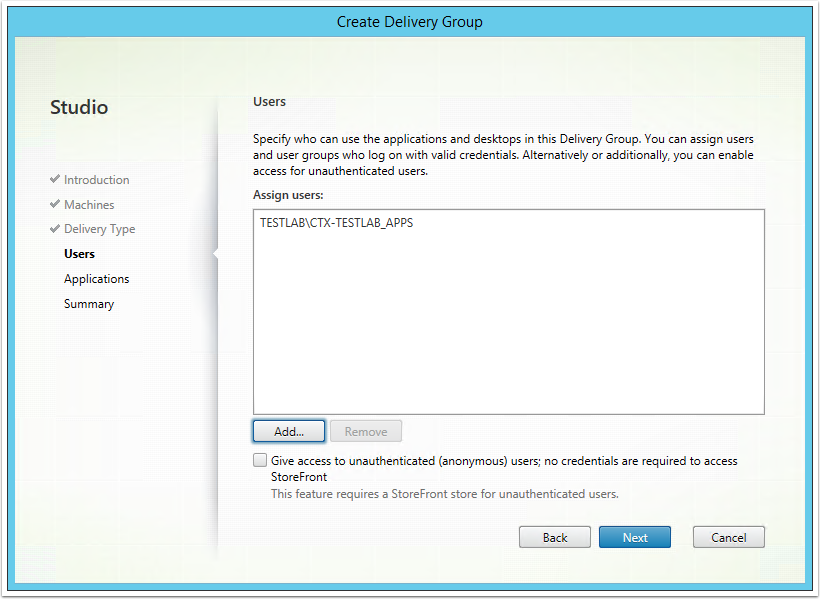
6. Add the Active Directory user(s) or group(s) that will have access to the Delivery Group. Click Next
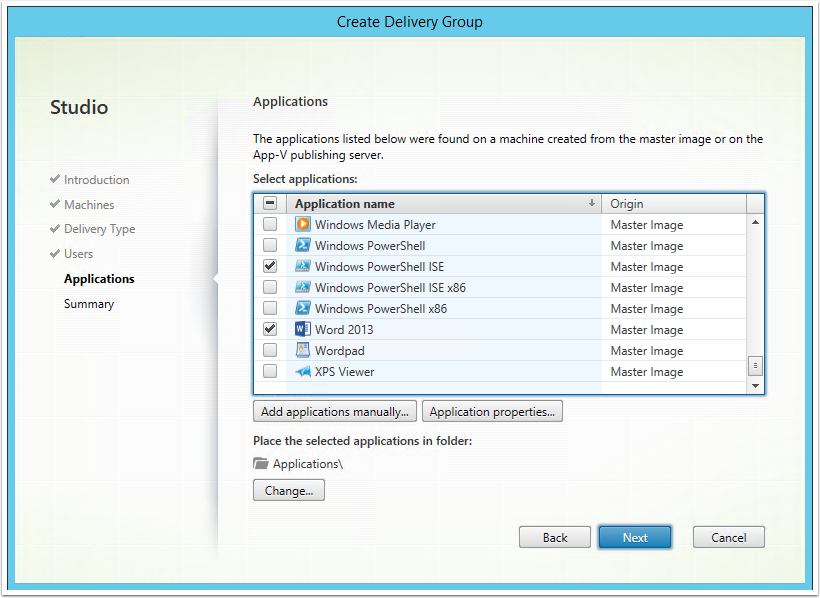
7. Select the applications you want to publish and click Next
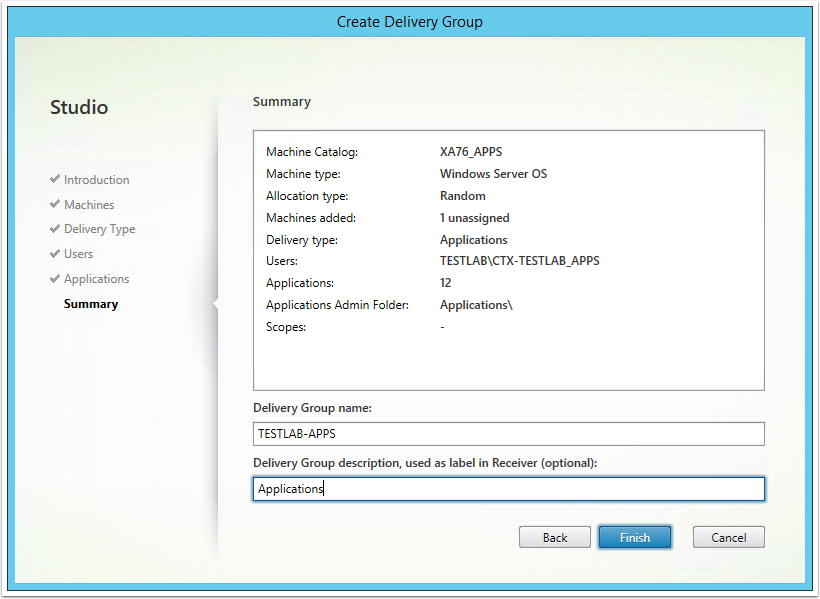
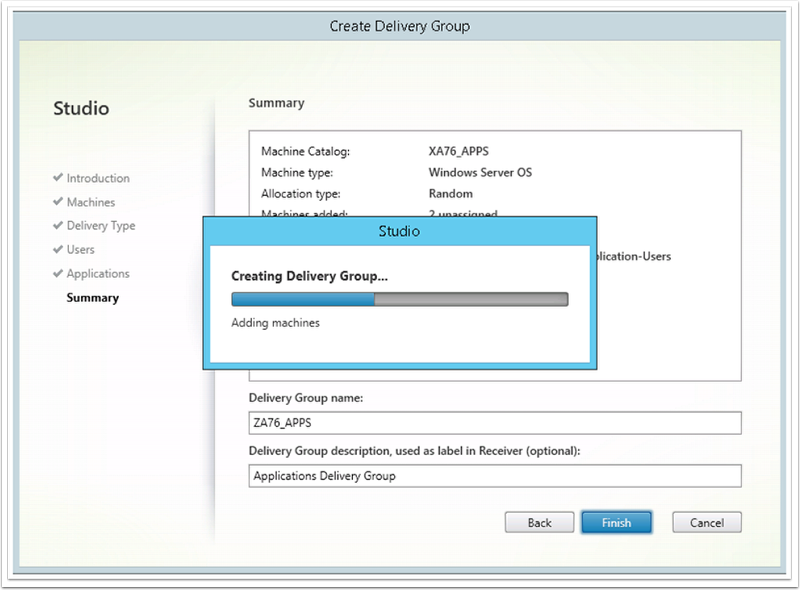
8. Enter a name and description for the Delivery Group and click Finish
9. The delivery group will now be created and configured. Click Finish once completed
10. From the Delivery Groups screen, you should be able to see the created delivery group as per the screenshot below
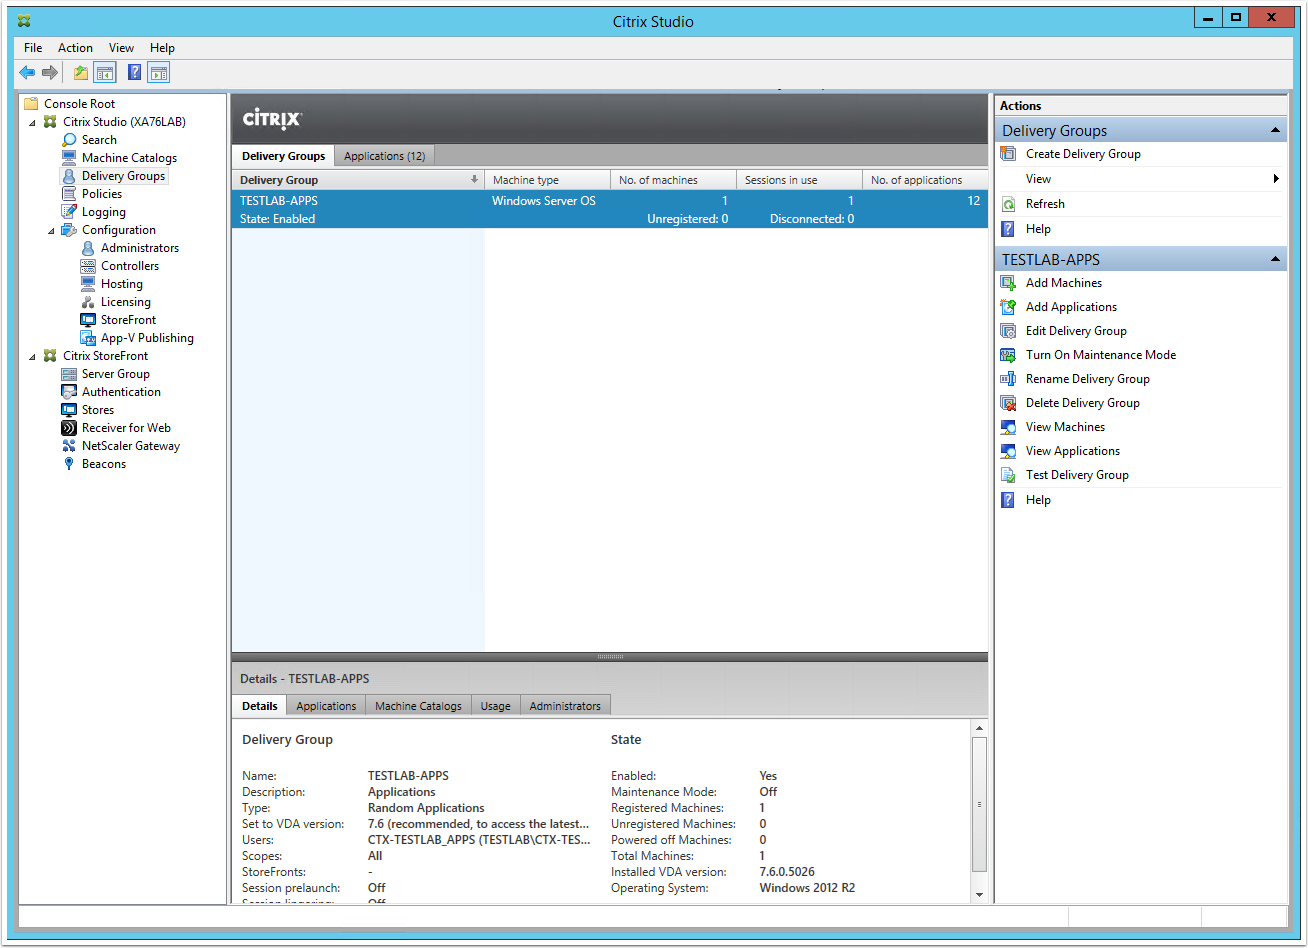
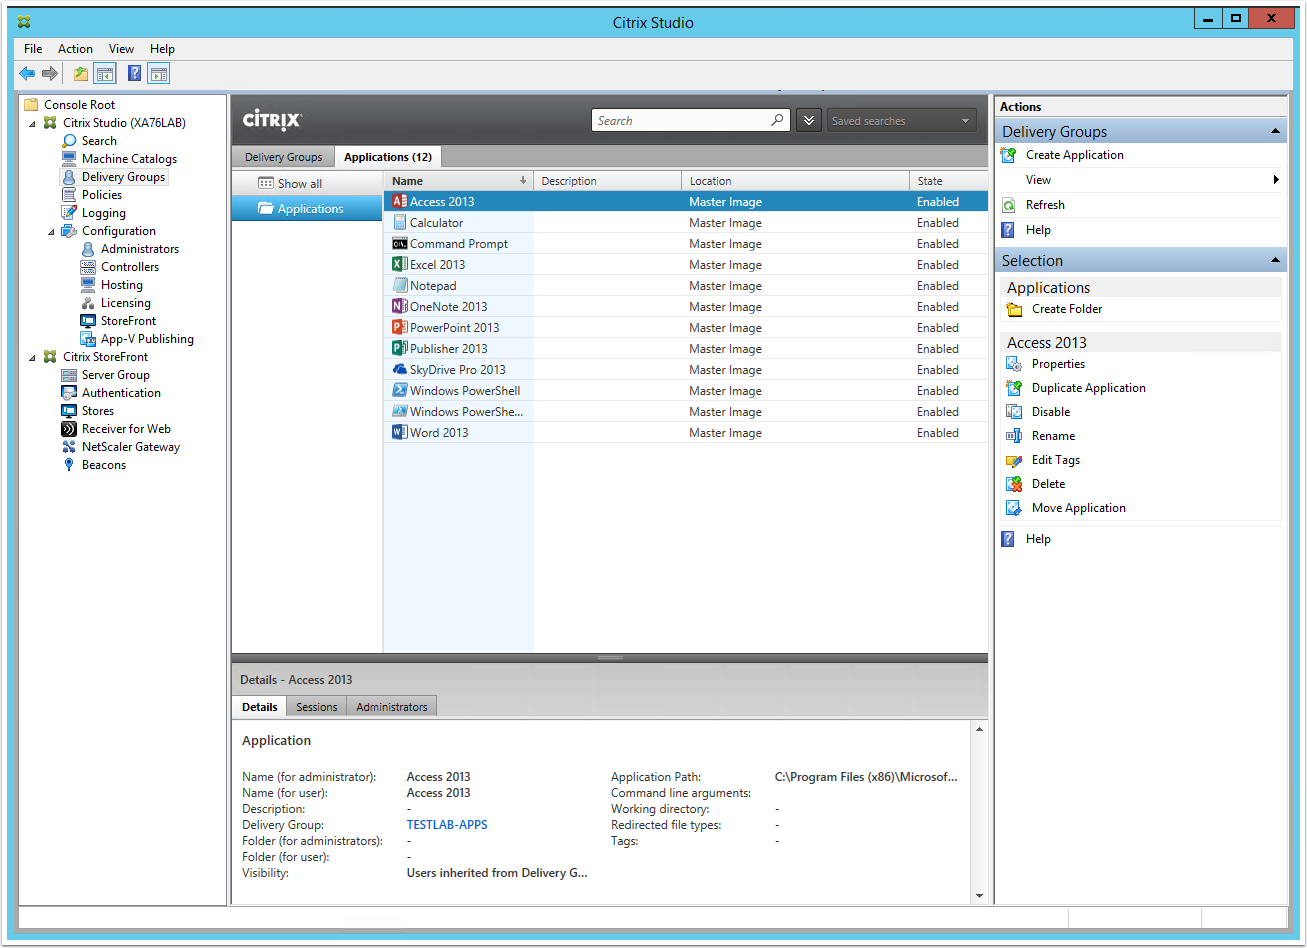
11. From the Applications tab you should see all of the applications you have selected to be published