Citrix PVS 7.6 Install – Part 11: Creating a PVS-Enabled Machine Catalog

This is part 11 in the Citrix Provisioning Services 7.6 installation and configuration guide. In this article we be creating a XenApp 7.6 machine catalog from a Citrix PVS collection.

Quick Links

Here are the links to each of the articles that make up this series:

Step-by-Step Guide

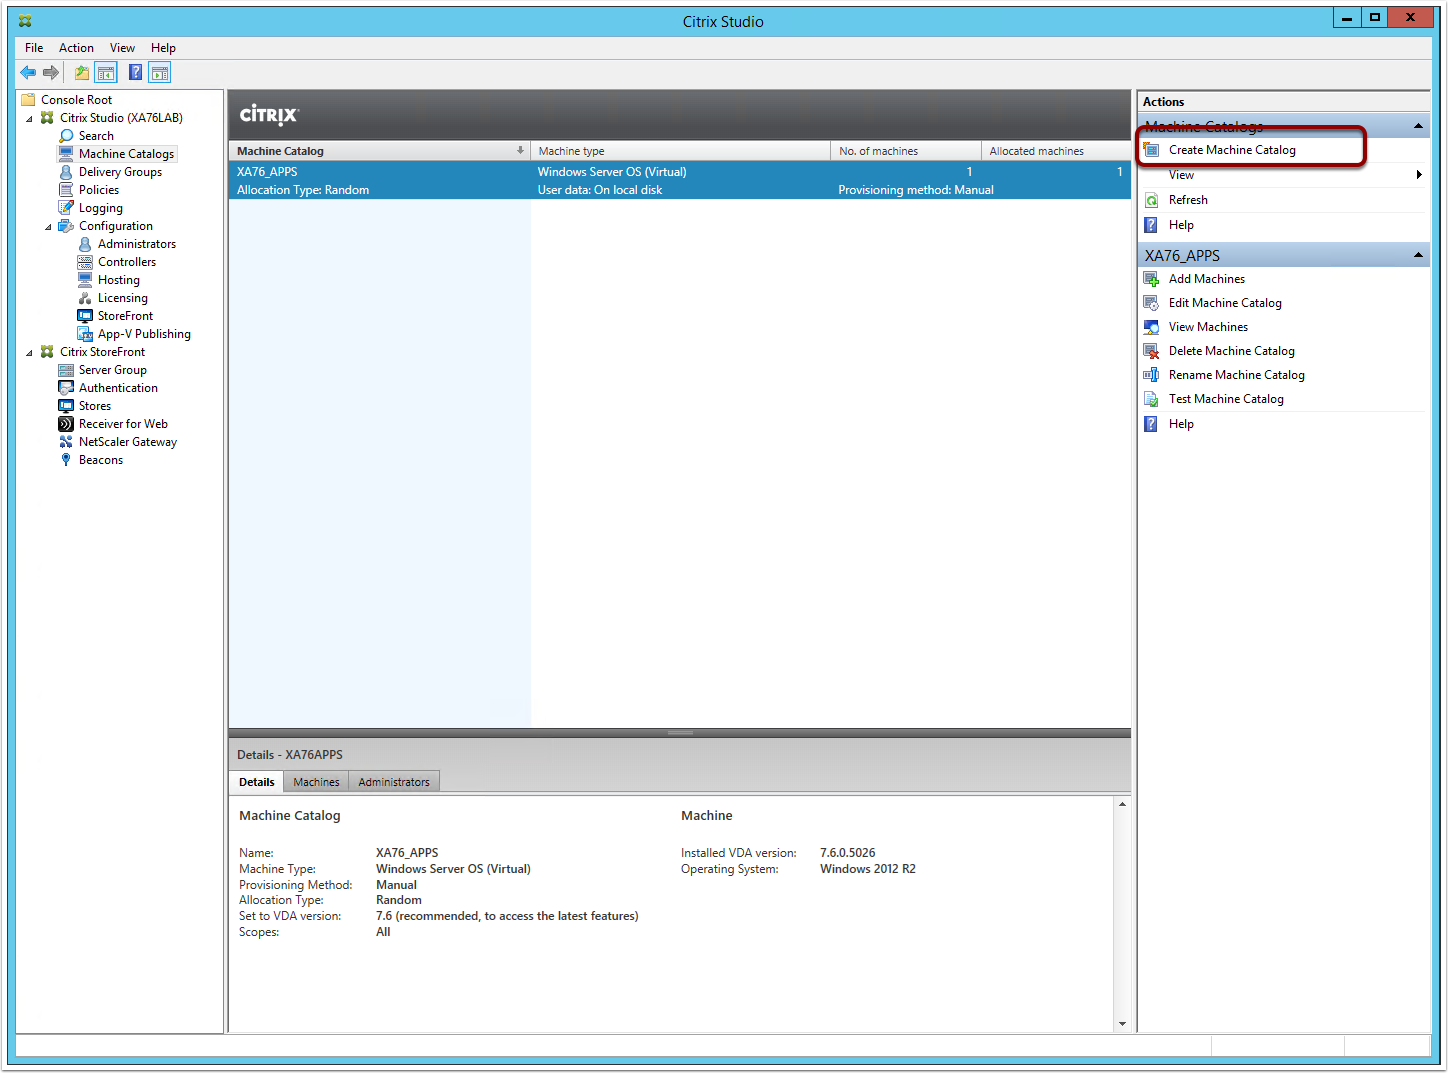
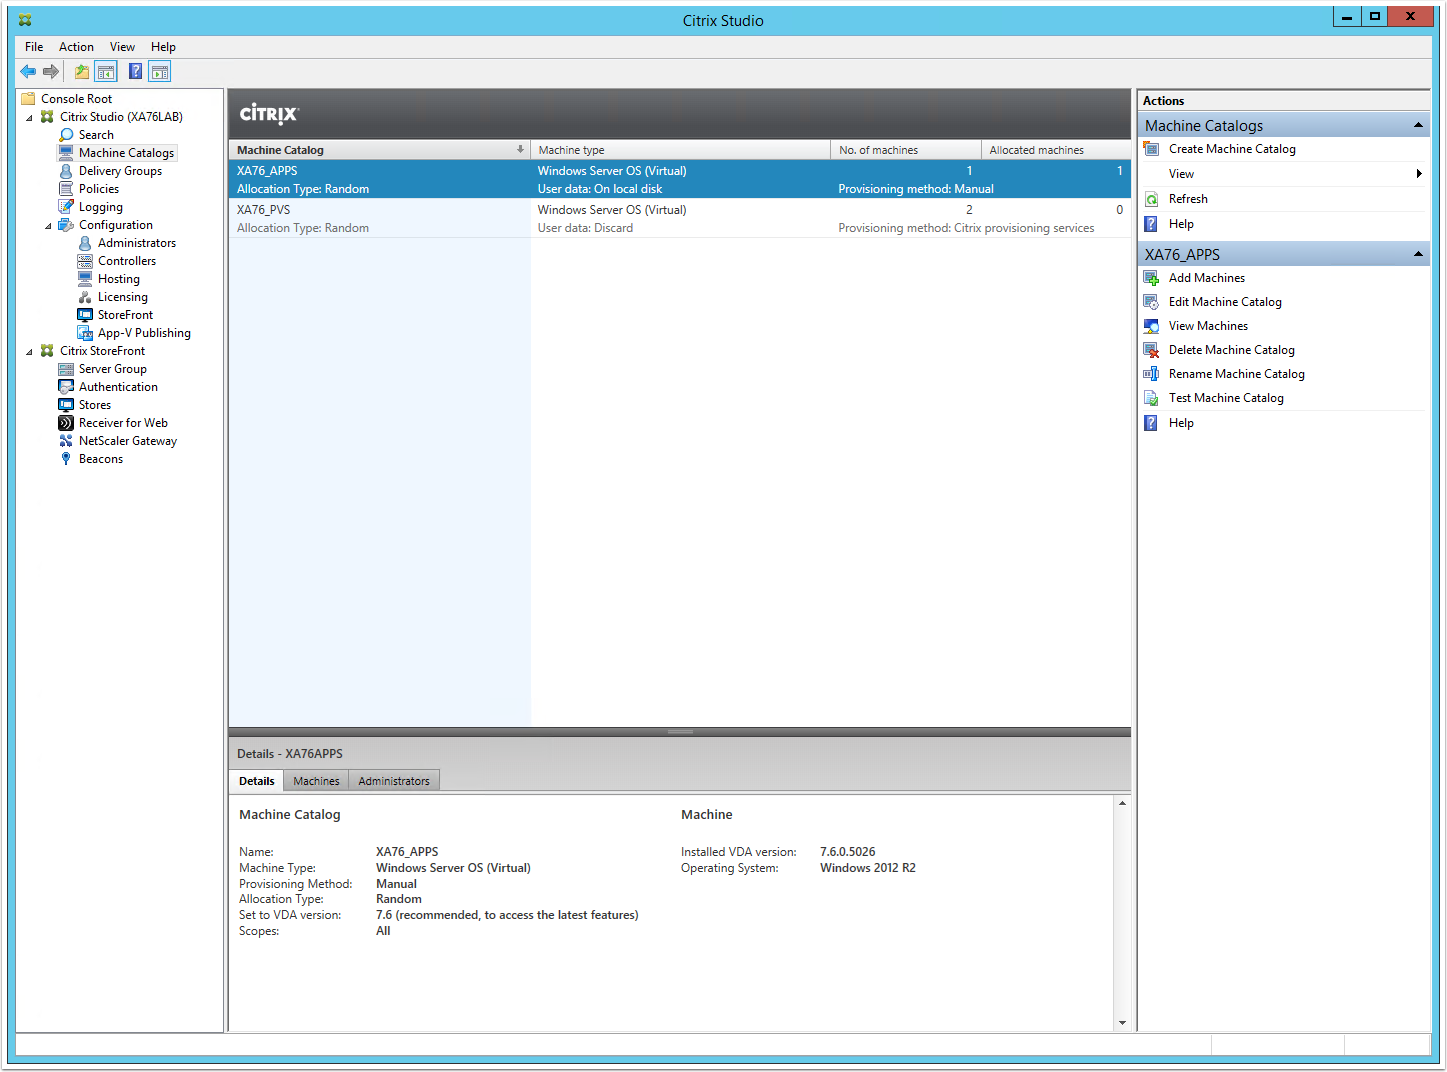
Now that the Citrix Provisioning Services 7.6 environment is up and running and the PVS Target Devices have also been configured and working, we need to integrate them into the existing Citrix XenApp 7.6 environment so that we can use them to publish applications to users. To do this, we need to create a PVs-enabled Machine Catalog which logically groups these into application servers. Machine Catalog’s are mapped into Delivery Groups which publish applications running on the servers within the Machine Catalog.

Note: The following article assumes that you already have a running and configured Citrix XenApp7.6 environment. If this isn’t the case, then please follow my Citrix XenApp 7.6 Install Guide first.

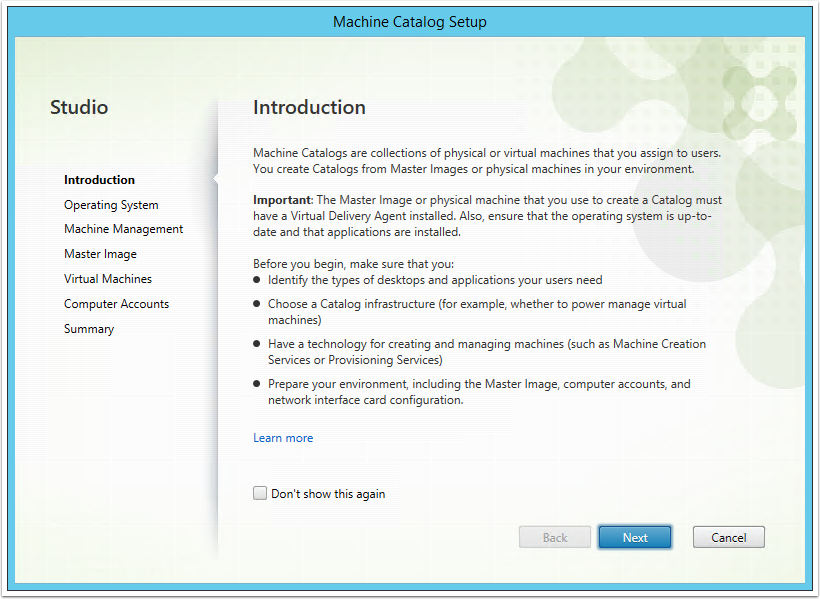
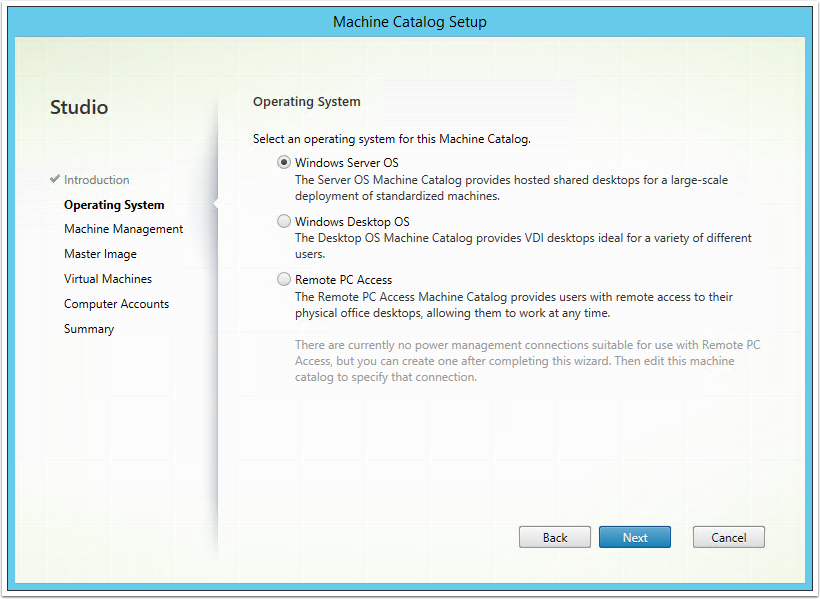
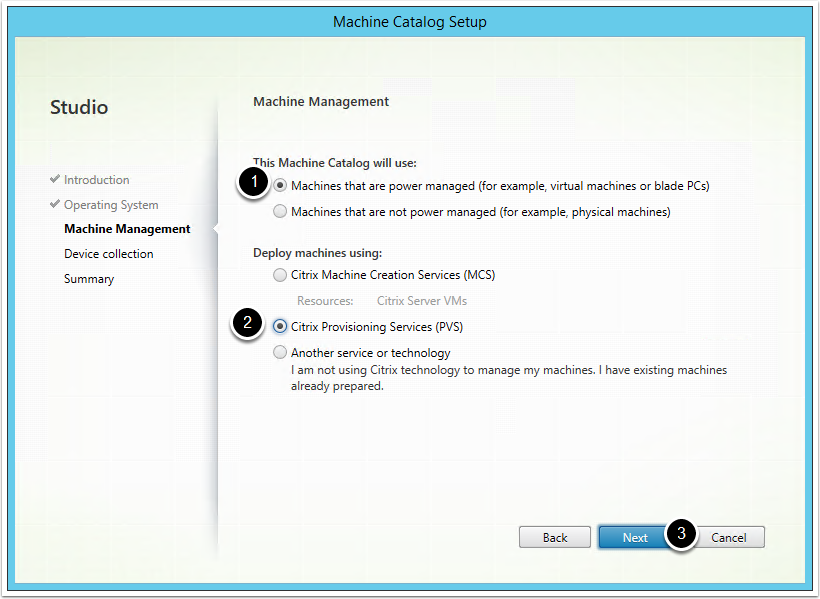
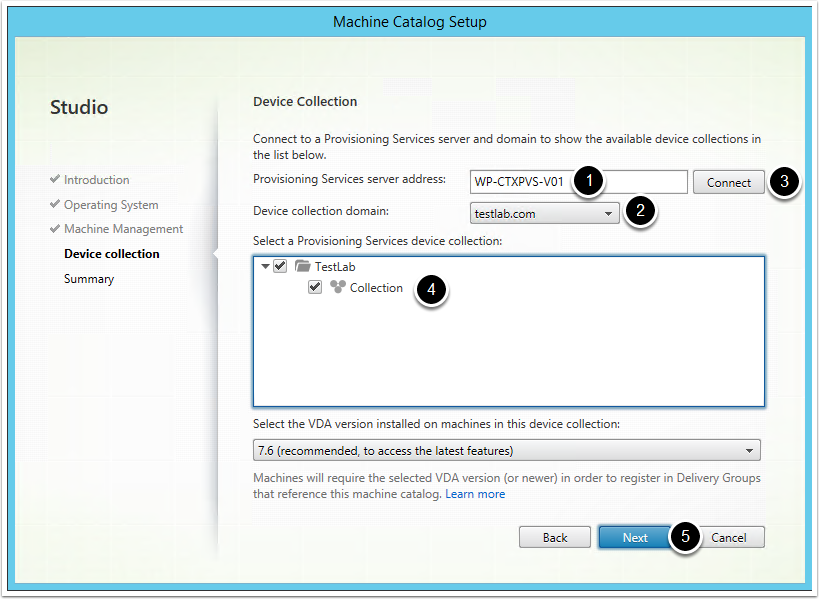
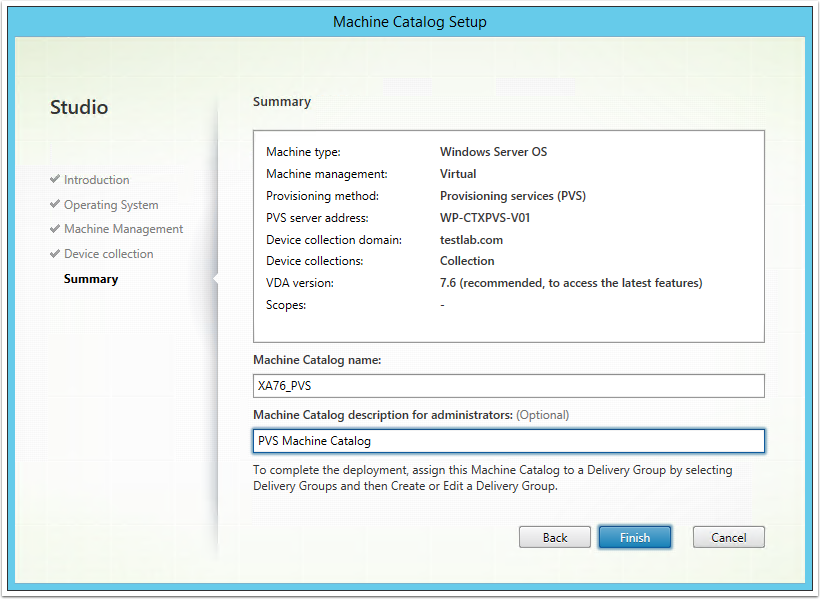
To create a XenApp 7.6 PVS-Enabled Machine Catalog, follow these steps:

1. Log into a Citrix Delivery Controller and launch Citrix Studio

2. From Citrix Studio, click on Machine Catalogs and then click Create Machine Catalog

3. The Machine Catalog Setup Wizard will appear. Click Next

4. Select Windows Server OS and click Next

5. From the Machine Management screen, complete the following:

  1. Select the "Machines that are power managed" option (Note: To select this option, you need to have configured the Citrix Site with VMware vCenter integration. If you would like to do this, follow my Citrix XenApp7.6 Install Guide)
  2. Select the "Citrix Provisioning Services (PVS)" option
  3. Click Next

6. From the Device Collection screen, complete the following:

  1. Enter the DNS name of the Citrix Provisioning Services 7.6 server
  2. Select the domain the PVS environment has been deployed in
  3. Click Connect
  4. Select the PVS device collection that contains the PVS Target Devices that will be members of this Machine Catalog
  5. Click Next

7. Enter a name and description for the Machine Catalog and click Next

8. Once completed, the new Machine Catalog should appear in the Machine Catalogs view of Citrix Studio

Next article…

The next article coming up in the series is: Citrix PVS 7.6 Install & Configuration Guide – Part 12: Creating a Delivery Group.

Comments

  1. Your article helped me a lot , Thanks!!
    Could you please help me with 2 questions:
    1. I have master image with Static IP , do I need to reserve IP in DHCP for this machine and remove static IP
    2. In DHCP scope i have mentioned only one IP however i Can see my both PVS servers are sharing target devises load how does that happen?

    Thanks
    Suman

Leave a Comment

This site uses Akismet to reduce spam. Learn how your comment data is processed.